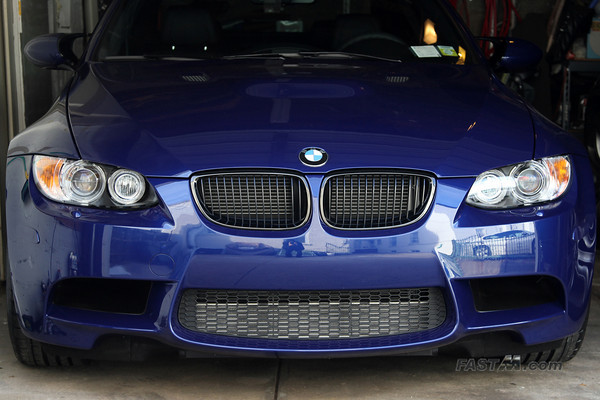
Vehicle: 2011.5 BMW E92 M3 Coupe
Install Date: December 24, 2010
|
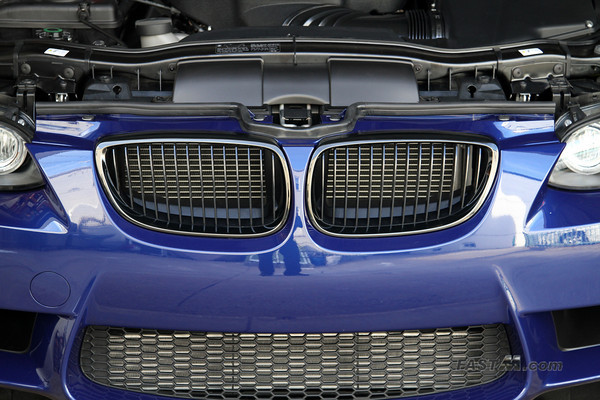
BMW M3 Edition Black Chrome Kidney Grills DIY Parts
Tools Required
Installation Install Time: (less than 10 minutes.) Before you begin:
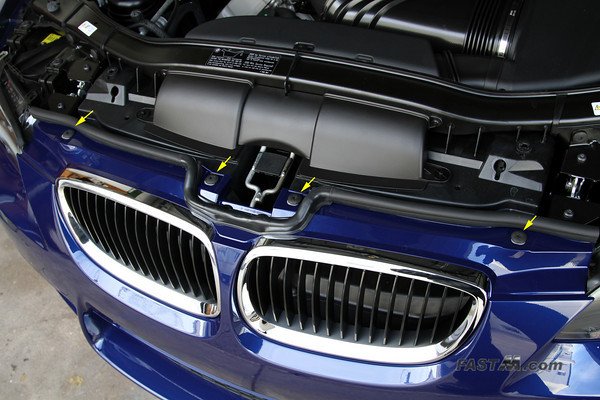
Installation Step 1. Remove upper bumper Torx screws As illustrated below, there are four Torx screws on top that will need to be remove to gain access to the front kidney grills.
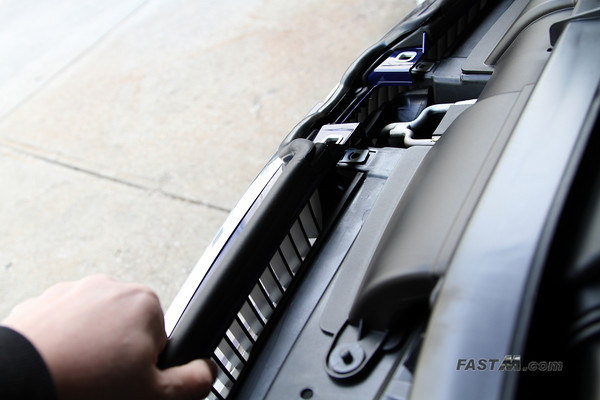
Step 2. Separate top of bumper Gently pull the top of the bumper forward to gain access to the back of the kidney grills. There should be enough flex to get your hands behind there. Feel around for the grill latches to familiarize yourself with their location.
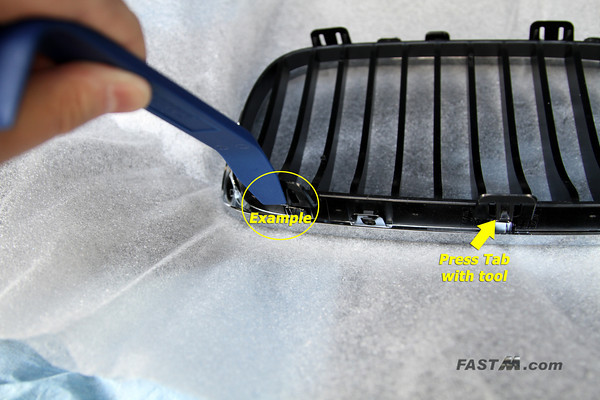
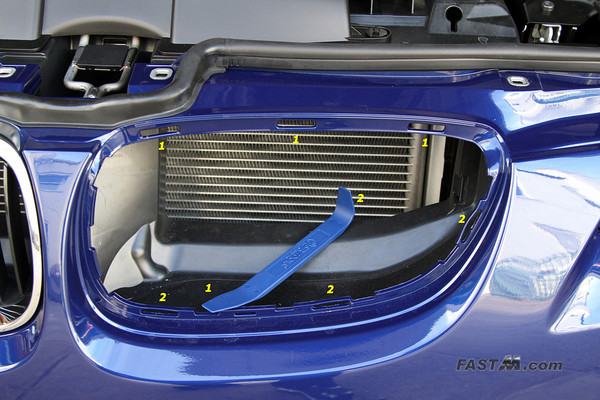
Step 3. Unlatch grill As illustrated below, there are a total of 6 latches. First use your fingers to see if you can unlatch it, if you can't you can use a body panel tool to unlatch the grill. The numbers on the illustration represents the end of the tool you should use. NOTE: Each latch has a small little tab that needs to be released. It can be difficult if you are using your fingers. A body panel tool or a flat head screwdriver should be used to make it easier to press the small tab in to unlatch the grill.
I found the bottom was easy to unlatch with fingers only. If you can't do it with your fingers, use a body panel tool similar to the one pictured or a flat head screw driver. To begin, I unlatched the bottom first while gently tugging on the grill outward. Then I unlatched the top using the tool to press the latch down. Lastly, I used the tool on the last outer latch (the latch closest to headlights). Once you get the first grill off you'll find doing the other grill much easy.
Step 4. Install new kidney grills and reinstall Torx screws This step couldn't be easier, simply push the new grills in till all the latches click in place.
Step 5. Sit back and enjoy your new grills
|